Music Recovery Part 2: Recovering on older devices
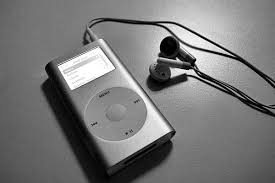
Older iPhone and iPod devices were easier to access from a file manager as they appeared just as a removable storage device similar to that of a USB drive. In that case all you need to do is to plug the device in and let it install the drivers.
 Once the drivers are installed all you need to do is find it in your list of available drives similar to that of a USB stick and copy over the music files back to your computer. Just find the Music folder within the drive and here you go, you music collection. You may need to enable hidden folders. A guide on how to do it for both Mac and windows is available here.
You may however require additional software should you want to edit playlist information or copy it back over to the pc. We will review examples of software that you can use a bit later on.
Older versions of iTunes may get data corrupt on interruptions.
In older versions only iTunes makes corrections to the database of the iPod and any disruption to the process can cause corrupt data and unfinished transfers where, the iPod will not know that the data is there and yet it will show up as if the space is used. More recent versions have added protection against problems like that to make sure that everything is fine if there is a problem at synchronisation.
On newer versions of iPhone and iPod it is a little bit more tricky to get all the files copied back over. This is because mobile devices have a full operating system running on them that is used to talk to iTunes. This means that by default all of the internal system files are hidden in the system. The system makes it better for synchronisation as the database is controlled by both iTunes and the media player itself which makes it safer when the cord gets pulled out during synch as the system will then correct all the errors on the mobile device.
Music recovery parts: Part 1 | Part 2 | Part 3 | Part 4

